My vote for the most subtle-yet-cruel entry in the category of brain mis-wirings is Imposter’s Syndrome. (It is also a first-world problem; apologies if this offends you.) I have it fairly bad, and it’s gotten worse as I age. It has prevented me from starting projects, finishing projects, and having normal levels of self-confidence. I am, thankfully, able to praise and mentor other people as necessary, but I cannot provide that for myself. Combine this with yearly instances of FOMO and you end up with someone who goes through waves of trying to join the party, only to feel sheepish once they get there.
This must end. Not in the manner in which my friends and fans might have hoped, but it simply has to end if I’m going to be available for the people who matter (including, most importantly, myself). So, it ends today. It ends with a list of things I’ve achieved in my life by my own skill, intelligence, and volition. I’m granting myself permission to be proud of everything on this list.
Sang on the stage at Carnegie Hall (a live performance, with a paying audience)
Participated in NAID ’95 and ’96, where I formed some friendships that helped me later in life
Created a viable “pied piper” audio compression method that can reduce already-compressed music sources up to a further 6:1 ratio with no perceptual loss in quality
And, most importantly:
Met my wife, became a better person for her, and started a family
That is truly my greatest accomplishment. It has directly touched hundreds of lives, contributed something positive to the world, and will outlive me by many decades, if not centuries.
But this person is going away, and this is the third-last post I will be writing on this blog.
I’m asked this a few times every year: Can you put a Sound Blaster in an IBM PC, PC/XT, or otherwise 8088/8086-class system? If you can, is there anything that can use it on that class of hardware?
The quick answer is yes and yes: As long as there are no hardware conflicts, you can put any of these:
Sound Blaster 1.0
Sound Blaster 1.5
Sound Blaster 2.0
Sound Blaster Pro
Sound Blaster Pro 2.0
Pro Audio Spectrum 8
Pro Audio Spectrum 8+
Pro Audio Spectrum 16
Thunderboard
…into any system and it should work fine. You’ll be able to use the onboard joystick port, and have Adlib/FM sound effects and music.
The longer answer has a caveat: There are less than a hundred sound-enhanced games that will run, and less than 20 of those will use the digital sound channel. The Sound Blaster was commercially available to consumers in 1989, which was right as the 8088 era was coming to a close. Only a handful of games were produced around that time period that supported the Sound Blaster and could still run on 8088-class hardware and supported the CGA graphics typical of 8088-class systems.
But, if you have a souped-up NEC V20/NEC V30 XT, you’re feeling adventurous, and you really want to hear some sampled (“digitized”) sound come out of your system, you can try running these:
Legend: 1) Used the Activision OmniMusic driver. There might be more games compatible with 8088+CGA that use this driver. 2) Need the rare “16-color” version of this game which supports CGA 640×200 2-color mode
There might be more than the above, but this is all I can remember personally testing.
For possibly much more comprehensive information on this subject, you can do no better than to check out Great Hierophant’s Nerdly Pleasures blog, which performs deep technical dives into these and other subjects.
It was even better to win. I’m happy to announce that 8088 MPH, the winning demo from Revision’s 2015 oldskool compo, won the Meteorik 2016 award in the category of “That’s not possible on this platform!”. A big thanks to reenigne, Scali, VileR, Phoenix, Puppeh, coda, and virt for making this happen. If that was my last year in the demoscene, what a way to go out!
One of my bucket list items since I read my first party report back in 1991 was to attend a european demoparty and compete in a compo. Icompeted at NAID ’96 and placed there, which was awesome, but to compete with the best of the best, and win, has always been a dream of mine. I’m happy to announce that after six months of hard work with good friends and extremely talented people, we achieved just that. Our demo, 8088 MPH, won the Revision 2015 oldskool demo compo. (A personal victory for me was having it shown last in the compo, which is a sign of respect that the organizers think it’s the best high to end a compo in.) As of April 7th 2015, there are no IBM PC emulators in the world that can run the demo properly; they hang or crash before the demo is finished, and the colors are wrong. Same goes for anything that isn’t the target hardware (see below). To see what 8088 MPH looks like, I direct you to the video+audio capture of the demo running on real hardware: Because there are so many technological world-firsts in the demo, and because we’re bending the hardware in ways that people have never thought to do so, it’s only fair that we try to explain exactly how this was achieved. One of my roles was “organizer” for the demo, so I’ll break it down scene by scene, covering the basics of each trick. For parts that I wrote, I go into some detail, but for a deep technical dive into certain areas, I’ll keep this blog entry updated to point to reenigne’s, VileR’s, and Scali’s blog posts about their parts. It is our hope that these discussions will foster revived “old-school” interest in software development for the platform. After you read this summary post, please visit the following links by us that break down, in-depth, specific sections of the demo:
Before going into each part, let’s define what the target system was for the demo: A 1981 IBM 5150 (aka the very first “IBM PC”) with 640 KB RAM, a floppy drive, IBM CGA card, and internal speaker. That setup consists of:
4.77 MHz 8088 CPU. 5 MHz seems like a lot compared to other 8-bit micros, but it takes the CPU 4 cycles to read a single byte. So, compared to other 8-bit CPUs like the 6502 or 6809, which can read a byte in one clock cycle, the effective clock speed of the 8088 is more like (4.77 / 4) = 1.19 MHz.
Video adapter that has a 9-pin RGBI interface and an RCA NTSC composite video interface. Driven by a Motorola 6845 character generator. No facilities for changing text characters; font is fixed.
Internal speaker; no sound card like the Sound Blaster, or special sound hardware like the C64 SID. Speaker can be driven by a timer pin to produce a square wave, or can be bit-banged directly via a port or a one-shot timer.
The 640KB RAM requirement seems steep, but not only was it possible to add that to the first IBM PCs, by 1985 it was quite common. If you still want to cry foul, then please note the only effect that uses just about all of that RAM is the kefrens bars, so that the repeating pattern would take longer to repeat and be more pleasing to the eye. We could have reduced it, but then you might have noticed the pattern repeating quicker. With the kefrens bars effect, the demo uses 507 KB RAM; without it, the demo uses 349 KB. Most effects use much less, and some are tiny, like the plasma which uses only 6KB (which includes the banner graphics) and the picture of the girl which uses 18K (2K more than the size of the raw picture data itself). We intentionally traded size for speed, which was a deliberate decision to fit as many effects as we could into 8 minutes running time, the compo limit. If we had a few more minutes running time, we probably could have fit the entire demo into 256 KB or even less, but you would have waited longer between effects. I should also note here that there were two different versions of IBM CGA produced, which differ mainly in how composite colors are generated. We had equal numbers of both “old” and “new” style IBM CGA cards, so we chose to compose graphics for the “old” style. If you have the “new” style CGA card, the demo will still run, but the colors will be off slightly.
Technical Breakdown
Development tools used
Turbo C
Turbo Pascal
Turbo Assembler
Turbo Debugger
Visual C++
OpenWatcom
NASM (and YASM)
DOSBox
A few real IBM 5160s (hardware equivalent to the 5150, but easier to find in the real world)
Any data files were directly included in the .exe/.com files themselves. This kept everything together in the same binary which means the data could benefit from compression (see below). Most development cycles involved designing in wetware, coding on a modern system (or DOSBox running on a modern system), testing/debugging in DOSBox, and then transferring over to real hardware for a final test. Once an effect grew so sophisticated it couldn’t run in an emulator any more, this cycle slowed down as testing could only be done on real hardware. Various transfer methods were used to get code to real hardware: Scali used a serial cable; I used an ethernet card running a packet driver and mTCP; at the party we used an 8-bit IDE ISA adapter (Silicon Valley ADP-50) connected to a CF-to-IDE adapter to make a CF card the hard drive, then used a USB CF card reader to move stuff back and forth. The most intriguing method of all was reenigne’s method, who used a custom controller connected to the keyboard port that used the IBM BIOS factory test mode as a poor-man’s serial port. (I hope Andrew writes up some details on that!)
Loader, API, and general structure
We all had different preferred development languages and environments, so it was decided early on to create an overseeing “loader” that would execute .EXE and .COM files, and then people could develop effects in whatever environment they wanted to. This is not a new concept; the famous Second Reality demo did this for exactly the same reasons, and the same technique was used even earlier than that on numerous demos on other platforms. (Before you ask: No, the Second Reality code was not copied; in fact, it wasn’t even consulted, as we had to write extremely tight code to minimize memory usage, and also have it work on an 8088 (the Second Reality code uses 80186 opcodes). The loader API services assemble to about 450 bytes of code. The loader, as designed, would be responsible for:
Playing music in the background
Masking the load times and precalc times of various effects using “megademo”-style text
Providing synchronization services (such as providing a vertical-retrace interrupt in software, and a user-definable countdown timer)
Running effects with the loader consisted of this workflow:
Print text on the screen and animate it using an interrupt and the 6845 start address register
Execute the effect
The effect would decompress, perform precalc, etc. and then signal the loader it is ready to start
The loader cleans up the moving onscreen text, then signal the effect it can start
Effect starts, magic occurs
Designing this correctly was extremely important, as any bugs would derail the entire thing. It was designed fully before even a single line of code was written. I’ve shared the design doc online for the curious. (I wrote the loader.) The background music playback had to be as simple as possible so as to not interfere with any effects. A single PC beep, changing (or silencing) once every frame, was the only thing that was practical, so 60Hz beeping is what the background music consists of. The composition program used for generating the speaker timer values was MONOTONE. Even though the code for playback is only 18 lines of assembler, it takes up two scanlines onscreen, so you can see how anything even slightly more complicated would have sucked much more CPU out of the system and some of the full-screen 60Hz effects simply would not have been possible.
Executable compression
Another decision early on was to see if executable compression was feasible, which means the following:
Does it actually compress things small enough to be worthwhile?
Is the decompression quick enough to avoid long pauses in the demo?
Does the decompression routine affect the system while it decompresses? (ie. does it disable interrupts or something else equally horrible while it decompresses, which would trash the demo?)
I gathered most classic and modern executable compressors and ran tests against old programs that were representative of what we would be producing. The results were welcome surprises. The compression ratios were good enough that we could afford to include precalc’d data instead of calculating it on the fly, and the decompression was fast enough that the total end-to-end time loading a program from diskette was actually slightly faster than if it were to load uncompressed. In the end, pklite emerged as the winner. I’ve shared the comparison data online for comparison. (If I missed any packers that hold substantial advantages over the ones in the data, please let me know what they are. There were nearly 100 packers made for DOS, but unless they compress smaller than apack or upx, or decompress faster than pklite or lzexe — all while remaining compatible with 8088 — then I don’t want to hear about them.)
Scene-by-scene breakdown
What follows is a screen-by-screen explanation of each effect. As previously stated, I’ll only describe scenes in detail if I wrote them; it will be up to the others if they want to write a technical breakdown for their parts. The explanation for each effect follows after the effect’s screenshot. The introduction was meant to serve two purposes: To educate the audience on the system and explain at just how much of a disadvantage we were trying to make a world-class demo on such hardware, and also simultaneously shatter their expectations :-) The text mode is obviously simulated; I essentially duplicated the basic BIOS functions for handling text mode but simulated in graphics mode. The cursor blinking and text blinking are handled identically to how the 6845 does it, adding to the illusion. It is (nearly) impossible to change the display start address of graphics mode such that every single scanline comes from a different place, so the title screen unrolling was done brute force, by copying new scanlines into memory hidden by retrace. The title screen goes away with a “fade” on the top edge by ANDing a mask on successive lines of the screen data. A lot of people think the title screen is the same picture demonstrated by VileR a few years ago. It’s not! He recomposed it for 16-color composite specifically for this demo, and changed it subtlety as well. The bobbing was achieved by creating a software vertical retrace interrupt that fired at the same place onscreen every time (just after the last displayed line) and then hooking it with a 6845 display start address change routine. Flags were used to communicate to the interrupt if it was time to erase the letters, which was done by simply using REP STOSW to fill screen memory with black lines. Because the 6845 displays two onscreen rows per “row”, the text could only move to even lines, which is why the movement isn’t as smooth as it could be. Well, to be fair, it could be made to move to any line we wanted, but doing so would be CPU intensive, and the whole point of the loader is to use as little CPU as possible, so this was the compromise. The simulated vertical retrace interrupt was provided through loader API services for the rest of the effects to use as well. Effects could disable it, re-initialize it, and hook/unhook their own routines to it. The moire (interference pattern) effect was achieved using a base of 40×25 text mode, the half-char block extended ASCII characters, and lots of unrolled code. The circles were chosen to represent the classic effect, but in reality the effect can combine any two images. reenigne’s effect. The rotozoomer is the same tired old routine I first rolled out in 1996 in the 8086 compo, but optimized to the hilt and sped up by only drawing every other line. A miscommunication between me and VileR resulted in probably not the best texture to demonstrate the effect, but it still runs well enough. There were plans to include a 60 Hz version of this effect, but we ran out of time. The core concept of the 1024-color mode is a serious abuse of 80×25 text mode with the NTSC colorburst turned on. VileR made the first discovery with 512 colors, and reenigne was able to double this to 1024 with CRTC trickery. Some people thought the entire demo was in this mode. It was not, because 80-column text mode suffers from the famous CGA “snow” defect when you write directly to CGA RAM in this mode. This is unfortunately visible in the plasma effect (see below). BTW, when I saw this picture in 2013, that’s when I knew I had to get all these people together to make a demo. I mean, geezus, look at it! My jaw dropped when I saw it. Had I never seen VileR’s collaboration with reenigne to make the above, 8088 MPH might never have existed. These stars were actually the result of unrolled code and a precalc’d table that, together, take a byte from one location and moves it to another position in video RAM. While we had other patterns ready, such as a swirling display, we felt the starfield was most appropriate for a typical “oldskool” demo. reenigne’s effect. The sprite part seems like black magic, but is the combination of using a sprite compiler written by Scali, and adjusting the screen vertically using the 6845 start address register. CGA only has one screen’s worth of video memory, so moving the address down scrolls the screen up, with the data repeating across the boundary. The data doesn’t repeat evenly across the boundary, however, requiring handling. The timer was monitored to know when the screen line containing the last pixel of the sprite had been drawn, which prompted redrawing the sprite. (In other words, re-drawing the sprite was an exercise in racing the beam.) Timing was very tight to avoid screen/sprite tearing effects. Also part of the compiled sprite effect, this displays 30 vectorballs at 30 Hz. We had an earlier display that used less balls to achieve 60 Hz, but Scali had the idea at the last minute to make them spell out something like “8088”, “IBM”, etc. and coded up the change at the party. The update is done using double-buffering; the sprites only take up a small rectangular area onscreen, so the screen mode’s CRTC settings were reprogrammed to provide a video mode with a small area in the middle of the physical screen, using only half of available video memory. This provided a true hidden page to draw/erase vectorballs to, which was then flipped to be visible using the 6845 display start address register. Using a 1024-color variant screen mode that could be updated using only the attribute byte (thereby limiting the number of colors to 256), this plasma had to perform writes only when the CRT beam was retracing horizontally or vertically. Unfortunately, the timing required to get this right stopped working at the party for some reason (probably happened as we were rearranging effect order), and as a result you can see a line of noise along the left side of the screen, and a little bit of noise at the top. This was my fault, as I wrote the effect using a somewhat lazy polling routine. It’s a shame CGA snow exists, because without all the retrace handling to avoid it, this effect runs at 60fps. In the demo with snow avoidance, it runs at only 20fps. VileR may write more about how this screen mode and color system is constructed, and if so, I’ll update the links at the top of this article to point to the method. If we come out with a final version of the demo, fixing this is at the top of the priority list. In fact, I’m betting reenigne could change this from a polling effect to a cycle-counting effect, which would not only fix the snow, but speed it up. The 1024-color mode reprograms the start address every two lines. I took advantage of this behavior to create a simple “drip” effect for VileR’s amazing artwork. Already you can posit that much more complicated effects are possible (thinking of the Copper demo here) but I ran out of time to make it more awesome. This classic Kefrens bars effect was done by reenigne in 320x200x4 mode. It’s a cycle-counting effect, as there is simply no time to monitor for horizontal retrace. To ensure the cycle counting was consistent, several things were done including changing the system default DRAM refresh from it’s default interval of 18 to 19, to get the DRAM refresh periods to line up with CRTC accesses. This was Scali’s effect and inspired by his 1991 demo which also featured a large torus. There are several things going on here:
Only changed portions of the screen are calculated and drawn, to minimize the amount of bandwidth needed to update the screen (this is the same “delta drawing” idea used in XDC). This was done because CGA video memory has a wait state, so the less you need to write to it, the better.
320x200x4 mode is used with a background and palette combination that gives this specific composite color palette, which included many shades of blue.
To help with the shading, dithering is applied during rasterization.
At the party, reenigne posited that it should be possible to restart the CRTC start address every single scanline. This would result in a video mode that was only 100 lines high, and would give a 80×100 resolution 1024-color mode. The above is the result of that coding, plus really extensive work done on a CGA NTSC composite signal modeling program done by reenigne months earlier to perform the image conversion. (No, you can’t have it. And before you ask, the “girl” and “CGA 1k” pictures were not stock conversions, but were hand-pixeled by VileR in Photoshop, and the 4-colors/16-colors/”Until Now” screens in a customized version of Pablodraw he created.) We didn’t have time to put text into this picture, so the people you see above are the same as in credits order: Trixter, reenigne, Scali, VileR, Phoenix, and virt. Apologies to coda and puppeh, but as you can see, any more squishing and the faces would have been unrecognizable. Sorry! Finally, the coup de grâce: A multichannel music engine for the PC speaker. We didn’t want to just copy a ZX Spectrum engine, nor other engines such as the one used in Music Construction Set, but rather set the bar impossibly high by playing a protracker mod through the speaker. Other modplayers for the speaker already exist, but they require a 10 MHz 80286, and can barely manage output at a 6KHz sampling rate. Ours faithfully reproduces all protracker effects, mixing and outputting to the speaker realtime at 16.5 KHz, all on a 4.77 MHz CPU. This was reenigne’s baby, and is a truly stunning technical achievement that required unconventional thinking and considerable 8088 knowledge to pull off. I’m sure he will write up a more detailed post on how it was done. Until then, I can mention the following details:
Preconversion of the module was necessary to align data structures and sample data to be favorable to how the 8088 indexes memory. Sample data is also converted.
Each sample must take exactly 288 cycles to calculate and output or else the sound goes completely pants. This was very difficult to achieve. 4.77 MHz / 288 = 16572 Hz sample output.
Audio output was done using traditional Pulse-Width Modulation (PWM) techniques, such as the kind made popular by Access’s Realsound. PC speaker PWM is performed by tying the PC speaker input pin to the programmable interrupt timer’s (PIT) channel 2, then programming PIT 2 for byte value one-shot mode. Any value sent to PIT 2 with the system configured like this will set the speaker HIGH and start a count, and when the count expires (ie. the sent value is reached), the speaker goes LOW again. This results in an audible carrier wave “whine”, which was why the output needed to be fast (16.5 KHz) so that the carrier wave was above the range of human hearing.
Fun fact: After preconversion of the song and being turned into a self-playing .exe, the final result is smaller after compression than the size of the original source module.
Party Sprint
At the party, we came with something that was 90% finished. Prior to arriving at the party, we created what we thought was a decent entry, and created two “failsafe” videos, one that was a capture for the bigscreen and another that showed the demo running on real hardware as verification for the judges. We were worried that the hardware we were bringing would get damaged in transit, so this was a precaution so that we could enter something if that happened. Thankfully, reenigne’s and Scali’s IBM 5160s arrived unharmed (which was especially remarkable since reenigne had to bring his from the UK to Germany on a series of trains!). We also brought two CGA cards, and two capture devices, and three different methods of exchanging new software bits from our laptops to the old hardware. You can never be too prepared! Most of the coding time at the party was spent adding the kefrens and ending portrait picture, eliminating bugs from each part where possible, adding nice transitions where possible, shaving seconds off of each part to stay within the compo limit, and rearranging parts so that virt’s BTTF-inspired tune’s intro lined up with the sprite part. We spent pretty much all our time before the compo coding, eating, or visiting the bathroom, and only had time to socialize after that. While we came mostly prepared for something that was worthy of entering the compo, the time spent at the party was invaluable for turning a rough draft into something that could really compete for first place. Having all four of us at the same table meant we could collaborate instantly. So, lesson learned: There are rarely substitutes for working together in person! One of the biggest improvements of “party collaborating” was the decision to change the credits from a variable-speed, text-only scrolling to a more evenly-paced, ANSI-style scrolling, which I think was the best implementation change compared to the bits we brought from home. To help save time (and to ensure the video was converted well — sorry, but most people don’t know how to deal with interlaced video properly), I offered to provide Gasman with a 720@60p video. The NTSC output of CGA is slightly off; instead of 262.5 lines per field, it generates 262. This means it generates 59.92 fields (29.96 frames) per second instead of the NTSC broadcast standard of 59.94 (29.97 fps). This throws off most modern capture devices; Scali had access to a high-quality Blackmagic Intensity Shuttle, for example, but it couldn’t lock onto the signal. I knew from experience that some cheap video capture devices, such as the Terratec Grabby or the Dazzle DVC100, have extra tolerance built into them as they were designed to be used with VCR sources, so I bought a few and sent one to reenigne for testing. For the capture, we used a DVC100 with some slight proc amp adjustments so that the capture looked as close to the CRT monitor output as possible. To further ensure better video capturing, we used VirtualDub for the capture software, which has an option to dynamically resample the input audio source to fit the capture framerate you are aiming for in case it’s slightly off, and the software and hardware combination worked very well. For grabbing the audio, we initially tapped the speaker with alligator clips, but Scali brought his Sound Blaster which had a real PC speaker tap you could hook up with an internal cable, so we used that for the final capture.
Looking to the future
After watching the demo and reading the above, you may be wondering if there is actually room for improvement. Believe it or not, there is: Alternative methods of sound generation and additional cycle-exact trickery are definitely possible. We had more effects to put into the demo, but ran out of time: We ran out of development time, and we also ran out of execution time, as the Revision compo limit was 8 minutes or less. I’ve known everyone who has worked on the demo collectively over 60 years. It was an honor and a privilege to work with them all to produce this demo. Will we work together again? I’d say it’s definitely possible; the day after the compo, we threw around some ideas, such as making a game next instead of a demo. Me personally, I’m burnt out and will be spending the next few weeks playing some games I’ve always wanted to finish, and working on my health. I also have some other large projects I want to get kickstarted this summer, such as something the PC software preservation movement desperately needs, and an online sound card museum. But hey, who knows.
This month marks the two-decade anniversary of me putting the first pages on the web describing what the demoscene was. No need for the wayback machine; the pages are still up and running, of sorts. Horribly outdated by today’s standards, obviously; you can get more and better information from wikipedia (until they decide to completely erase the demoscene as being not notable, of course). But it was current enough a year later to get me interviewed for a Wired magazine article on the demoscene, which was cool at the time.
Those were the days when you learned how to write HTML by looking at the source of other pages. I’m writing this post in a fully AJAX editor that is probably written completely in javascript — I’m not sure, as I’m too afraid to look under the hood for fear of burning my retinas out.
I’ve formally released the source and binaries for the 8088 Domination encoding system under its original working title: XDC (stands for X86 Delta Compiler). Head on over to x86dc.wordpress.com to browse the github source, grab some example videos, browse the documentation, or watch a screencast where I encode a video from farm to table in under 30 minutes.
Now you too can impress your friends with your own custom videos that run on a 4.77 MHz CPU with 16K of video memory!
The response to 8088 Domination was warm, wonderful, and widespread. To everyone who dropped me a note via twitter, email, or youtube — and there were thousands of you — I want to thank you for the kind and encouraging words.
Even before I finished the design, I knew that I was going to release all of the source, so that others could make their own videos for their own vintage systems. I was careful to design the system to be easy to understand, so that it could be easy to port to other languages or extend with new features. I have a lot of comments in the code, some fairly verbose, so that there is no confusion why something is designed a particular way, or why one operation happens before another. I want this to be representative of the quality of code I usually write.
So, why am I overdue in releasing the code? Bugs! Or, more accurately, edge cases. To ensure that the encoder works properly in the real world, I’ve been testing it with vastly different sources: Animations, music videos, cartoons, even a full-length movie. And almost every time, I encounter a new edge case that needs fixing. Oh, don’t worry — The code isn’t full of special cases or bubblegum-and-shoestring workarounds. It just takes time to address each issue that crops up, and determine if it’s a true bug that needs fixing, or an issue that can be safely ignored.
“Ignore issues in code? Impossabru!” Actually, here’s an example of what I mean: I discovered a few weeks ago that I could improve the efficiency of the output a few percent by re-running some optimization phases before final compilation. However, doing this will sometimes create a small “empty” 1-byte delta that actually isn’t a delta (ie. the locations contains the same data in the previous and next video frames). It’s a bug, but is it worth fixing? I could spend days rewriting the optimization phase into a gigantic, monolithic procedure where all parts coordinate… or, I can throw these 1-byte non-changes away at the end of the existing optimization phase. You can guess which path I chose.
Some bugs are indeed bugs, and they must be fixed before I put my name on the code. For example, the bug that forced the encoding loop into a deadlock, or the bug that randomly produces black flashes in the output (still working on this one), or the bug whose generated code forgot to set a single register which prevented videos from being played without a soundcard present.
So, I hope everyone understands why the code release is late. Well… one of the reasons it is late. The other reason is that making your own videos will require some documentation (some user-directed preprocessing of the source video is necessary — sorry!), and a video showing the steps involved couldn’t hurt either, so that will require a few days by itself.
While you’re waiting, why not help me decide what movie to convert and release with the final distribution? In keeping with the spirit of the time period, I’m going to convert an entire full-length movie using the system, and ensure that it will fit onto a single CD-ROM so that users without homebrew XTIDE controllers can hook up a SCSI CDROM drive and enjoy the flick (ironically). The defacto example for this kind of thing is Star Wars, although I’m partial to TRON, as it was released after the IBM PC itself was and has its own share of iconic sequences. But, I’ve already done TRON to death, so what would you like to see? Vote in this handy poll, and if the movie you want to see isn’t there, please write your choice in the comments.
This is the second (and last) part of my write-up on how 8088 Domination was achieved; the first part is here. I reuse some terminology introduced in the first part, so before we continue, it’s worth reviewing some key definitions to avoid confusion:
Delta: An area of bytes that needs to change in screen memory to update the displayed image Slice: A delta where not all bytes are the same value Run: A delta where all bytes are the same value
On to the nitty-gritty!
Breaking With Tradition
If you’ve coded video or animation systems in the past, you may have correctly identified what I’m doing as less of a video codec and more of an animation system. Animation systems from the 1980s such as Autodesk Animator or DeluxePaint Animation store and play back deltas by iterating through data that describe what areas of screen memory to change, using codes and chunk types for things like “skip N pixels forward, then change M pixels”, “fill entire screen to solid color N”, and so on. This reduces the size of the file, but requires some decision-making and branching while iterating through the data.
I initially did the same thing, and wrote a fast routine that would iterate through a list of deltas to replay, handling runs using the efficient REP STOSB sequence, and the rest with REP MOVSB. It looked something like this:
Delta format:
0-1: start offset
2:   length in upper 7 bits and run/slice in LSB. If set, is run.
3:   fill value (if run; unused if slice)
4-N: data (if slice)

Decompressed via:
; Prior setup:
; DS:SI=source data
; ES = destination (screen RAM)
; DX = number of deltas to iterate through

@loopit:
    lodsw       ;load offset
    xchg di,ax  ;get destination ready
    lodsw       ;load bit, length, value
    shr ah,1    ;isolate LSB?
    mov cl,ah   ;move length into place
    jc @run     ;if so, it's a run
                ;runs are the exception; slices should fall though first
@slice:
    rep movsb   ;copy slice to screen
    ;okay to fall through here since cx=0, rep stosb will do nothing
@run:
    rep stosb   ;replay run to screen (AL already has value)
@continue:
    dec dx
    jnz @loopit
This is optimal 8088 code for this operation, but the idea has two problems. First is a minor annoyance; a byte is wasted storing a fill value even if we aren’t handling a run. But the real problem is that there are two branches (JC and JNZ) for every delta we iterate over in the list. Branches are costly on almost all CPUs, even those as old as the 8088. This was a huge concern for me, as the average new image in my test material was made up of roughly 600 deltas, most of them slices. Some quick math to illustrate why this concerned me:
# of cycles available to us to paint a frame: About 40,000
# of cycles taken up by one untaken (JC) and one taken (JNZ) branch: About 24
# of cycles used by branches to replay 600 deltas: 14,400 (36% of our total)
So, in a typical frame full of changes, more than a third of our available CPU time is wasted handling branches. In a system where we have the same time quantum as 8088 Corruption but are trying to change more data than it did, this was a big step in the wrong direction!
I thought of a few ways to mitigate this cost, such as unrolling the loop, rearranging deltas so that slices and runs are grouped together, and so on. This went on for about an hour before inspiration struck: Why not eliminate the branches altogether?
And just how the hell do you do that? By generating code instead of data. Instead of having the encoder spit out a description of what changes need to be made each frame, we switch to generating x86 opcodes that, when executed, directly implement the changes themselves.
This is the same strategy used to accelerate sprite plotting on many architectures, but when I realized I’d be doing the same thing for the entire screen, I started laughing out loud. What a ludicrous idea! And yet, in practice, you can see that it works.
It’s A Compiler!
The basic structure of a video “code” frame looks like this:
Startup code: Sets ES to point to the screen and DS:SI to point somewhere below its own instruction stream to where the data stream starts Instruction stream: Instructions that re-point DI to new screen memory destinations and then issue combinations of MOV, MOVSB, STOSB, REP MOVSB, or REP STOSB to change screen memory contents Cleanup code: A single RETF instruction to return to the caller Data stream: For (REP) MOVSB, data that gets moved to areas of screen memory
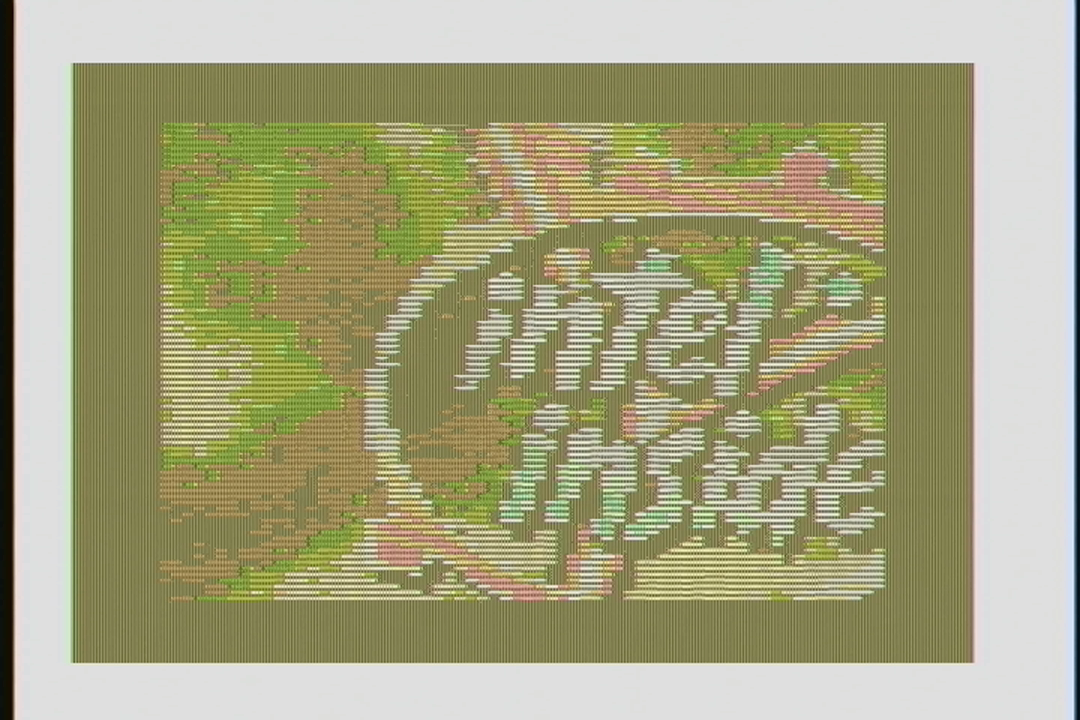
As long as the code is aligned to a DOS 16-bit paragraph boundary, it will execute properly, so the player code enforces alignment of the frame data to paragraph boundaries. Not doing so results in hilarity, as the correct screen memory locations will be changed properly, but with data from the wrong place:
This is supposed to be an anime girl, not digital vomit
(It is, of course, quite possible to rewrite a few values in the code to get it to execute properly wherever it is located, but I didn’t want to perform code fixups realtime at 60hz — the system is already slow, let’s not make it any slower.)
Because the instruction stream adds size and processing time to the video data, it’s important for us to generate optimal code that is as fast as possible without being too large. For example, if you want to set a single byte in an arbitrary location pointed to by ES:, most x86 asm programmers would do it like this:
ES: MOV BYTE PTR [nnnn],val
This is fast and is 5 bytes in size. But if you have your value pointed to by DS:SI, you can also do it like this:
MOV DI,nnnn
MOVSB
This is also 5 bytes (4 opcode, 1 data) but is slightly slower… but because MOVSB advances DI automatically, it can save you from having to do the same thing manually. For a single byte it’s not a win, but what if we have three bytes to change? We can continue to set them directly:
ES: MOV WORD PTR [nnnn],mmmm
ES: MOV BYTE PTR [nnnn],mm
…or do this instead:
MOV DI,nnnn
MOVSW
MOVSB
The latter method is much smaller and slightly faster. (This can go on for a while, but eventually there is a break-even point where switching to REP MOVSB is faster than all other encodings.)
Although I had worked out most optimal combinations for various slice and run durations, in the end I felt it was better to just have the compiler generate every code variation, calculate how many cycles each one took to execute, and pick the fastest one. (I figured it was safer and more future-proof than me trying to hand-optimize generator output.) Calculating cycle counts for the 8088 is almost as easy as it is for 8-bit CPUs; the 8088 has only one core, no cache, no threads, no pipelines, no out-of-order execution… it does have a prefetch queue, but it is only 4 bytes long so it isn’t very effective. The major factor in optimizing 8088 code for speed is minimizing memory accesses, because the CPU takes 4 cycles to read (or write) a byte — any byte, even instruction stream opcodes. So, in most cases, the smallest code usually wins. The only exceptions to this rule are instructions that take an extremely long time, such as MUL/DIV, which can run for over 100 cycles depending on the operands.
Andrew Jenner, a good friend and a better coder than I am, has an excellent rule of thumb for determining 8088 code execution speed: Multiply the size of the opcode and the size of any data touched by that opcode by 4 for an informal cycle count; then, also determine the sum of each instruction’s published cycle count. Whichever number is larger is the more accurate execution time estimate.
I won’t go over the code generator itself in this write-up because it is very mundane and not terribly exciting; refer to the source code when I release it in a few weeks.
Delta Optimizations
Once I had an idea of the code generation cost, I came up with a couple of ways to reduce that cost by manipulating the delta list before it was processed by the encoder. Less work for the compiler to do meant smaller code/data and faster execution. Delta optimization consists of four phases:
Run Identification and Splitting. Because runs process faster and encode much smaller than slices, it is a huge win to identify any runs hiding inside of slices and split them out into their own delta. This phase also marks any runs it finds as excluded from further processing (“frozen”), as runs are already optimal.
Pixel “Shaving”. Changing only a single byte in screen memory has a very high cost (5 opcode bytes, plus the time they take to execute) so pixel “shaving” looks at each single-byte delta to determine how many pixels are actually changed by the byte. If a particular threshold is not met (ie. “more than one pixel”), the delta is dropped completely. This is a user-configurable option and is off by default.
Delta “Shaving”. Identical to pixel shaving, except entire deltas are dropped if they aren’t large enough. The default threshold is “more than two bytes”; anything smaller is dropped. This is also user-configurable, and also off by default.
Delta Combination. This phase looks for deltas that are spatially close to each other in linear memory and combines them together if the end result would encode as less bytes. For example, assume we have three 1-byte deltas all spaced one byte apart. Also assume that replaying these three deltas costs 5 bytes each, for a total of 15. Now consider what happens if we combine all three deltas into a single delta spanning the three changed bytes: The number of bytes changed onscreen will grow by 2, but we shed 10 bytes because we only have one delta to set up and replay. It is a net win, so it is always worth it to try to find combination opportunities. (This is technically an NP-hard problem, and implementing it quickly and stupidly as an exhaustive search greatly slowed down the code. I optimized it by re-sorting the deltas by start offset, so that the search space is localized around the delta(s) being examined. After all the combinations are found, the deltas are re-sorted back into the order that assists the encoding phase, as described earlier in part 1.)
All of these phases reduce size and execution cost. The pixel shaving and delta shaving phases have the added benefit of cleaning up the source video a little; if a pixel is “shimmering” over time due to being right at the error threshold of the dithering process, it will be “stable” with pixel or delta shaving turned on. The drawback to the shaving phases, however, is that the output can leave “trails” onscreen as smaller changes are never fully cleaned up or overwritten. Use with caution.
(While not benefiting optimization, there is also a prep phase that executes before the other phases and performs oversize delta splitting, which takes deltas that are too large to execute within our available cycle pool and breaks them up into smaller deltas. This is always necessary when the entire screen changes, as this creates a delta list that consists of only one single delta with a start offset of zero and an end offset at the edge of screen memory. A delta that big is way over both the available byte and cycle limits, so it has to be split into smaller chunks to be replayed over multiple passes.)
Playing With Variable Packets
The player for the 8088 Domination FMV data is very similar to 8088 Corruption: By controlling the size of the audio data the soundcard interrupt handles, we can get the interrupt to fire at our desired video framerate and use the opportunity to update the video as well. The interrupt handler pulls data out of a queue and updates the screen at the same time it updates the audio. While the interrupt is firing in the background, a foreground loop is constantly reading from disk and putting data into a queue. I cover this in more detail in 8088 Corruption Explained, so if you have a half hour to kill, I highly recommend snagging the MPEG-2 file (best quality) and watching it.
Where the players differ, however is in two areas:
Instead of moving video data to screen RAM, the Domination player CALLs the video frame code, which executes and then returns
The read-and-fill-memory loop, as well as the interrupt handler pointer management code, deals with variably-sized video+audio packets; this is because the output of the encoder varies in size based on how many changes are present from frame to frame
Two changes were made to the muxed video+audio stream for Domination that not only enabled handling variably-sized packets, but also sped up disk reads. The first change was to align each packet of video+audio data to disk sector boundaries, which sped up disk reads due to the way DOS handles buffering: DOS will normally transfer disk requests into its own internal buffers (if you’ve ever wondered what the BUFFERS= line in CONFIG.SYS was for, now you know) and then copy to the caller’s buffer. However, if the caller requests reading a sector-aligned offset (and amount) into a normalized paragraph-aligned pointer, DOS is smart enough to instruct the BIOS to transfer the data directly to the caller’s buffer. This made disk reads return a little quicker, as DOS’s usual double-buffering step was avoided.
The second change to the player was to keep track of how large each video+audio packet was. Rather than put size headers before each chunk, or scan the entire file before starting to determine sizes, I chose to write an index to the end of the file stream. The index consists of one byte per video+audio packet, where each byte indicates the size of the packet in sectors; this is possible because each packet is guaranteed to be aligned to sectors. (This limits the size of each packet to (255*512) = 127.5KB, but we will never see a single frame that large in practice; in fact, we will never see a packet larger than 64KB because that is the 16-bit real-mode segment size limit.)
The most amount of time I spent enhancing the player for the Domination format was, to my surprise, the memory handling. The original player used a circular buffer (a FIFO queue) that fed disk data into the “head” while the interrupt handler grabbed data from the “tail”. Typical circular buffers are divided into fixed-size blocks, but I had just switched to variably-sized packets. I needed a FIFO that could:
Accept variably-sized allocations/deallocations
Manage a linear area of memory with wraparound without requiring that area to be a power-of-two length
Be interrupt-safe (ie. no locks/mutexes/semaphores required to put data in or pull data out)
Perform all of the above while dealing with 16-bit real-mode segment limitations
In the end, I wrote code that was not so much a typical circular buffer, but more of a heap manager where the caller “reserves” an amount of memory, receives a pointer to an area they can use, fills it with data, and then “commits” the area. Prior commits can be retrieved in FIFO order using another function. The design is interrupt-safe because reserves and commits don’t touch the data structures that are used by retrievals, and vice versa. I know it sounds stupid to be proud of a data structure, but I was pretty pleased with myself when I finished implementing it. (I’ve since learned there is a similar construct out there called a bip buffer, but a bip buffer wastes more memory and time than what I came up with.)
In Search Of Test Material
With two fully-functioning video modes supported by the encoder, I now had to choose some test material to show it off. For the color portion, I decided to use exactly the same footage that I’d used 10 years earlier with Corruption, so that people could directly compare them and see for themselves that the newer method was better overall. For the B&W portion, I had difficulty picking material; I was about to go with one of the old Apple silhouette-style ipod/itunes commercials until I saw a Game Sack episode where a homebrew Genesis cart was shown playing the Bad Apple animation. I was hooked — it was perfect test material. High-contrast shadow puppetry lent itself very well to my “animation compiler” because, most of the time, very little is actually changing per frame, and what is changing has very clean residuals.
Finding a clean source of the Bad Apple animation proved more difficult than I thought it would be. Every youtube version had resizing or transcoding artifacts, so after some research I found the original japanese video-sharing site it originated from and grabbed it from there, which resulted in an extremely clean 30fps source to work with.
Conclusion
8088 Domination may be my best work; I’m very proud of the result. I had to think creatively and unconventionally to solve problems. If people are considered artists based on the uniqueness and viewpoint of their output — paintings, novels, musical works — then I’d like to think programmers can be artists too, and judged by the same conventions.
I want to fix a few bugs in the source and tidy it up, and once I’ve done that I will release the source, executables, and documentation so that you can create your own videos using the system. Until then, enjoy a video of the competition I showed it at, complete with audience reaction:
These next few posts are a technical write-up of how I created 8088 Domination, which is a program that displays fairly decent full-motion video on a 1981 IBM PC. Before reading further, it might be worthwhile to familiarize yourself with the production itself if you haven’t seen it. Here is video of what it looks like running on a 1981 IBM PC 5150 connected to a TV via the composite output jack:
…and if you doubt the above video’s authenticity, you can download the production and run it on your own vintage hardware as proof.
I would like to apologize in advance for switching between past tense (ie. my thought process during the design phase) and present tense (when describing how to achieve certain objectives) throughout this write-up.
Background
I’ve been fascinated by desktop digital video for decades. Starting with the first Video For Windows tools in the early 1990s, using early capture hardware (like the Media Vision Pro Movie Spectrum, which captured directly into MSV1/CRAM format), I’ve toyed with desktop video and its possibilities.
Of course, I’ve also been fascinated with demos since the early 1990s, and when you love two things that much, you find ways to mash them together. Many of my demoscene productions have had video as a part or whole of them in some way. Grind (1993) was a modplayer that displayed dancing Spring Break girls in perfect time to the music; the end-part of Explicit (1996) has dancing clubbers embedded in cubes, also dancing in perfect time to the music; and of course 8088 Corruption (2004) which displayed FMV on a 1981 IBM PC and took a chunk out of my 15 minutes.
8088 Corruption was not recognized for amazing quality video, but rather its novel solution to the problem of trying to display FMV on such a limited platform. That solution was to use 40×25 text mode, since that was the only mode represented in an amount of video memory that could be completely changed every frame without distracting artifacts or overtaxing the system.
I gave a talk in 2007 that explained 8088 Corruption in detail, and in that talk I explained that displaying FMV using CGA in graphics mode would be impossible. This is because CGA graphics mode uses 8x the amount of video memory that 8088 Corruption was handling. Even a simple calculation assuming 24fps video reveals that the amount of data needing to be updated per second (24fps * 16KB = 384KB/s) is outside of the IBM PC’s capability: CGA RAM can only be changed at a rate of 240KB/s, and most hard drives of the era operate at roughly 90KB/s. It sure felt impossible, so that’s why I said it.
Then I thought about the problem for 7 years.
Adjusting Expectations
I came to several realizations over the past few years thinking about this “impossible” problem. The most basic realization is that it isn’t always necessary to change every single pixel on the screen to show convincing FMV. If only a portion of the frame is in motion, such as in traditional animation, or a “talking heads” newscast, not every pixel is changing onscreen. But even if all pixels in a frame are changing, they might only be changing just a little bit… and if they are changing that little, the viewer might not notice if we cheat and don’t change them at all. So, we need to let go of the idea that we must change the entire screen every frame. With the right picture content, we can get away with changing only a portion of screen memory, and it will look like we’re changing the entire screen.
Left: Black and White=differences, Grey=unchanged. Right: What the user sees after applying only the changes
Another realization was found re-evaluating what kind of bandwidth is available on the system. Previously, I was using the “40×25 text mode 2K of RAM” definition as the limit of what can be changed onscreen. But “2K of data changed” isn’t the real limitation; rather, it’s “not exceeding the time it takes to alter 2K”. In other words, the real limitation is not exceeding a specific time quantum per frame updating screen memory, no matter how much screen memory you’re changing.
This lead to a similar thought about disk I/O. In Corruption, I treated disk bandwidth as a series of fixed-length reads at a frequency of the framerate I needed to produce. As a result, Corruption uses fixed-length video+audio packets, so that (framerate * packetsize) is guaranteed to be less than the available disk bandwidth. But there’s no reason to adhere to that; the real limitation is the disk I/O itself, and I could read any amount of disk I wanted in a given time period as long as I didn’t exceed what the hardware could provide. This lead to the realization that video+audio packets could be of a variable length.
The combination of these and other ideas led to the design of a system that could fulfill the original requirement of “FMV in graphics mode”, which means we need a system that:
Finds differences between frames and updates screen memory with only those differences
Keeps track of how much time it takes to change screen memory and doesn’t exceed it
Keeps track of how much disk space is used and doesn’t exceed the transfer rates of the disk subsystem
Most importantly, degrades gracefully if we run out of CPU time or disk bandwidth before the source image is finished displaying
Because the IBM PC is not fast enough to make these decisions realtime (nor has the bandwidth to do so), all of these constraints needed to be handled during the encoding phase, when we have nearly unlimited time. That also means that most (if not all) of these constraints are really just data management problems, which I’ll get to later. But before we write even a single line of code, we need to back up a little and see how to convert 24-bit color pictures into something that doesn’t look like total crap on a CGA card.
CGA FMV Graphics Conversion
A quick primer on CGA: CGA was the first color graphics standard for the IBM PC, and contains 16KB of memory to hold screen contents. That memory can be presented as a few different graphics modes that appear different, but are actually all the same under the hood: 80 “byte columns” wide by 200 lines. Those 80 byte-columns can be sliced up a few different ways:
640×200 with 2 colors (1 bit per pixel)
320×200 with 4 colors (2 bits per pixel)
160×200 with 16 colors (4 bits per pixel)
Let’s see what those look like in practice. Here’s a pretty hummingbird:
…and here’s that hummingbird converted to our three basic choices without any fancy processing:
160×200, 16 colors
320×200, 4 colors, palette 1
640×200, 2 colors
Already the graphics programmers in the audience are screaming DITHER THAT SHIT, and they would normally be correct. However, most dithers that people are familiar with are error-diffusing dithers, which means that error differences are propagated throughout the entire picture. This is not a good idea for a system that is going to be recording changes between frames just like LoL does in their challenger series, because if a single pixel changes in the source material, every single pixel in the dither algorithm’s row scanning order after the change is going to change as well. What we need is a so-called stable or localized dither, where the value of each output pixel does not depend on its neighbors. That way, when only a local area of the source material changes, only that area of the destination dither will change as well.
While there are some modified, alternate dithers that keep error propagation to a spatial minimum (ie. Riemersma dither, which dithers along a Hilbert curve), the only truly localized dithering algorithm I know of is ordered dithering, sometimes called Bayer dithering. Some of the best publicly-available research on color ordered dithering is by Bisqwit (“Yliluoma’s arbitrary-palette positional dithering algorithm“) so I won’t try to explain the concepts here; consult that instead.
Applying even a rudimentary ordered dither to our sources now shows this for our hummingbird converted to our three graphics modes:
160×200, 16 colors, ordered dither
320×200, 4 colors, palette 1, ordered dither
640×200, 2 colors, ordered dither
Much nicer, and we don’t have to worry about the dither introducing massive differences between frames if only one pixel changes in the source.
While all three of those modes look viable in their own way, for Domination I had to make the decision to discard the middle one (320×200, 4 colors). This is because the 16-color and 2-color modes display properly via the composite output jack on the CGA card, and I knew I’d have to present at the compo with the native hardware hooked up to a projector. So my choices were limited to 160x200x16 and 640x200x2.
Managing Ch-Ch-Changes
The very fastest way to change screen memory on the 8088 is to either copy a linear sequence of bytes using REP MOVSB, or set a linear sequence of bytes all to the same value using REP STOSB. With this in mind, I chose to keep track of each change as a starting and ending offset of changed bytes, because that was closest to the exact method I would be using to “replay” those changes. I adopted a terminology to reduce confusion throughout the source code: I coined the term “delta” to refer to an area of changed bytes, and further classified deltas into “slices” (a delta where not all bytes are the same) and “runs” (deltas where all bytes are the same). This was important because “runs” can fill screen memory extremely quickly using REP STOSB, so it was worth keeping track of them. Here is the actual data structure I used:
  TDelta=object(TObject)
    startOfs:word;         {starting offset of delta in buffer (first changed byte)}
    endOfs:word;           {ending offset of delta in buffer (last changed byte)}
                           {rest are calculated during insert or other operations:}
    dtype:deltaType;       {slice or run}
    fillvalue:byte;        {for informational purposes only, not used for anything}
    blength:word;          {length of delta in bytes}
    numPixelsChanged:word; {# of pixels changed in the entire delta}
    REPcycleCost:real;     {different whether slice or run}
    frozen:boolean;        {flag used to control various optimization phases}

    Constructor Init(starto,endo:word);
    Destructor Done; virtual;
  end;
All of these deltas needed a good structure to collect and manage them, so I decided to use a Turbo Pascal 7 data structure called a TSortedCollection, which is analogous to a sorted linked list. Deltas were added to this list and maintained in sorted order using a variety of criteria in the following priority:
Larger/Longer Deltas placed before smaller/shorter ones
Given the same length, “runs” placed before “slices”
All runs sorted by their fill value
Given the same length, all deltas sorted by their interlaced start offset in memory
The sort order seems like an odd thing to mention here, doesn’t it? I’ve done so because it was a contributing factor to the success of the project, as it solved many data processing problems later on. It was so helpful that I think it’s worth going over in detail:
Larger/Longer Deltas placed before smaller/shorter ones: As we process deltas from the top of the list to the bottom, the largest areas of the screen will change first until we run out of bandwidth. If we decide to completely jettison the list entirely before it is finished due to bandwidth starvation, only the smallest changes at the bottom of the list — the ones that don’t matter very much visually, as they only change a few pixels — are discarded.
Given the same length, “runs” placed before “slices”: This gave priority to runs, because setting an area of screen memory with REP STOSB is both faster and smaller than trying to copy the same area with REP MOVSB.
All runs sorted by their fill value: This came in handy during the encoding phase, where I was able to set a fill value once and then cache that value for subsequent runs if applicable. I would not have been able to do that if all the similar fill values weren’t right next to each other.
Given the same length, all deltas sorted by their interlaced start offset in memory: This was an aesthetic choice; if I had to change an area where all deltas were exactly the same length (like a rectangular area of the screen), this allowed the changes to “paint” in somewhat linear top-to-bottom order. This is necessary because CGA’s framebuffer is not organized in a linear fashion, but is interlaced.
For the curious, this is what the sort operator looked like:
Function TDeltas.Compare;
{
We want to maximize motion fidelity, so we are going to make our lives
easier and sort deltas by size.
Note that the comparisons are reversed -- that's because we want the largest
deltas at the beginning of the list.  (-1 means beginning of collection.)
- We add a second comparison so that deltas of the same length are sorted
by cycle execution time; this keeps runs prioritized over slices in terms
of what to prioritize if our bandwidth gets starved.
- We add a third comparison so that runs of the same run value
are kept together, so that we can cache the run value.
- We can optionally add a fourth comparison so that, all things being equal,
deltas are sorted by start offset compensated for CGA interlaced memory layout
(this is what I'm colloquially calling "Dave Murry interlace handling"
based on how Dave handled it in the PC booter Sierra Championship Boxing).
}

var
  k1so,k2so:word;

begin
  k1so:=PDelta(Key1)^.startofs;
  k2so:=PDelta(Key2)^.startofs;
  if MurryHandling then begin
    {if k1so > screenRAMsize div 2 then k1so:=k1so-(screenRAMsize div 2);
    if k2so > screenRAMsize div 2 then k2so:=k2so-(screenRAMsize div 2);}
    k1so:=k1so AND $1fff;
    k2so:=k2so AND $1fff;
  end;
  {sort by delta length}
  if PDelta(Key1)^.blength > PDelta(Key2)^.blength
    then Compare := -1
    else if PDelta(Key1)^.blength  PDelta(Key2)^.fillvalue
            then Compare := -1
            else if PDelta(Key1)^.fillvalue < PDelta(Key2)^.fillvalue
              then Compare := 1
              {sort deltas by start offset}
              else if k1so  k2so
                  then Compare := 1
                  else Compare := 0;
end;
With the data structures finalized, encoding one video frame's worth of changes becomes a simple matter of doing the following:
Scan the preexisting frame and new source image for differences, and insert each found difference into the delta list data structure
Determine the amount of CPU time and disk bandwidth we have available to paint our changes (a “byte pool” and a “cycle pool”)
For every delta in the list, starting with the first and iterating to the last:
Estimate the cycle and byte cost to paint this delta
If our cycle or byte pools won’t be exhausted by these costs, encode the delta to disk and then remove it from the list, then updated the pools
If one of the pools will be exhausted, skip this delta and move to the next one, which will likely be smaller or faster (or both) and have a better chance of not exhausting a pool
If we empty the list, we’re done with the frame
If we reach the end of the list, we are out of “time” for this frame and need to either:
Spend the next frame going through the list again to finish up so that the existing source image has a chance to fully display, or:
Throw away whatever is left and start working on a new source image
That’s pretty much it. When I release the source in a few weeks, you’ll see that the code implements the above logic very closely. However, there’s one very important detail that I haven’t explained yet, and it’s critical to playback performance: What does “encode the delta to disk” mean exactly, and how do we play an encoded delta back to screen memory as quickly as possible? Head on over to the conclusion of our thrilling tale, where I’ll explain how I came up with a unique solution to that problem.


You must be logged in to post a comment.